Showing posts with label Lunar New Year Challenge. Show all posts

Wednesday, November 6, 2024

November Lunar New Year Inspiration


Yes, it is time for another fun Lunar New Year Challenge. It starts at the beginning of every month and we are so blessed to have 4 sponsors. That is right, that means 4 prizes to be won. All you have to do is link up HERE on the Lunar New Year Challenge Blog

The rules are simple. You must create a new Lunar New Year, Chinese New Year, 2024 Dragon Birthday or 2025 Year of the Snake card (find inspiration HERE and HERE)! Multiple entries are allowed. Backlinking to an older project is strictly prohibited.

Our November Lunar New Year Challenge will run from 12:00am EST on November 1, 2024 through 12:00pm EST on November 30, 2024. We would love to see you using products from our four generous sponsors! The four lucky winners will be randomly selected from all eligible entries and announced at the start of the December Challenge.


Today I am getting crafty with one of the amazing sponsors Catherine Pooler. I have created this card using the Paper Lantern Die and the Origami Cheers Setniments Stamp Set


Create card from white cardstock A2 size.

Cut a panel A2 size on white cardstock and ink blend purple and pink on the panel but try and leave a little white in the center where the two colors will meet. This will give a highlight behind the lantern. 

Sprinkle a little of Copic Opaque mixed with water onto your background and then adhere it to the card base using liquid glue. 

Die cut the longer on white cardstock and very lightly ink blend the same colors that you used on your background. Very lightly.... 

Cut some gold glittered cardstock to adhere to the back using foam tape for a little dimension. Make sure to only put the foam tape where you will not see it from the front. Now adhere your lantern to the center of the card using more foam tape. 

Stamp out this adorable bird from the Origami Cheers Sentiments stamp set on white cardstock using black ink.  and die cut or fussy cut the image and adhere to the lantern using foam tape. 

Finishing with the beautiful sentiment from the same stamp set Origami Cheers. Stamp the sentiment in black ink. 


Need more inspiration... make sure to follow the Lunar New Year blog for inspiration and you really don't want to miss your chance on winning one of these amazing prizes. 

Thank you for stopping by.
Have a wonderful day full of smiles.

Sunday, October 6, 2024

October | Lunar New Year Challenge


Happy October blog friends..  Today and I am sharing some inspiration for the October Lunar New Year Challenge and I am creating one of our amazing sponsors. Lawn Fawn has a great selection for your Lunar New Year creating. Today I am using Lawn Fawn:

Create card from white cardstock A2 size.

Die cut the large Outside in Stitched Scalloped Rectangle Stackable on a piece of the Candy Cane Lane paper. 

Die cut a piece of white cardstock using the third largest rectangle from the Pink & Main (Layered Rectangles A2 die set, add some foam tape to the back and adhere it to the center of the LF rectangle. 

Die cut the second largest LF Outside in Stitched Scalloped Rectangle on a different piece of the Candy Cane Lane paper and add some foam tape to the back and adhere it to the top of the white rectangle. 

Add some liquid glue to the large rectangle and adhere it to your card base. 

Stamp out these adorable images from the Year Thirteen and My Lucky Charm  on white cardstock using black ink and color them using your favorite medium. Die cut the images using the coordinating dies. 

Create your scene with your die cut images. Stamp the steam from the Year Thirteen stamp set in black ink right above the Dim Sum. 

Stamp the sentiment from the Winter Wavy Sentiments directly onto your background using black ink. 

Finishing with a little sparkle here and there. I used misc. silver gems. 


So simple and cute.... don't you think? I love these sets together. Plus don't even get me started on these amazing patterns on the paper. 

Thank you to the amazing sponsors.

Visit the October Link-Up Party post HERE to see all of the design team projects and be inspired to create your own! When sharing your challenge entries on social media, feel free to save this badge and post it along with your project. Please tag us @lunarnewyearchallenge on Instagram and use the hashtag #lunarnewyearchallenge so everyone can find and be inspired by all your amazing projects. 

Thursday, August 22, 2024

Happy Chinese New Year | Lunar New Year Challenge Inspiration


Happy hello blog friends.. today I am here to offer you a little more inspiration for the Lunar New Year August challenge. There is still time to link up HERE for a chance to win. 

Today I am getting crafty with Penguin Palace:


Create card from white cardstock A2 size.

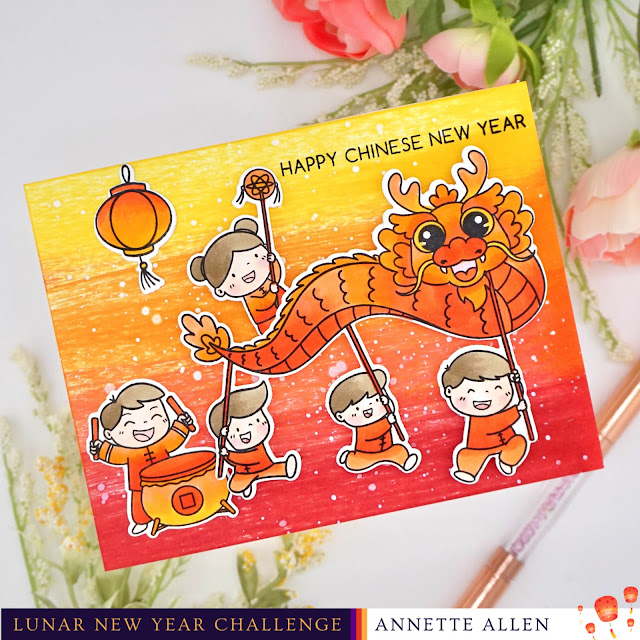
Cut a white panel on white cardstock A2 size. Pick a yellow, orange and red ink that you love and slide the inks from left to right directly onto the white panel. One color at a time and you can repeat the process until you are happy with the color on your background. 

Sprinkle a little Copic opaque mixed with water on your background and set aside to assure it is completely dry. Once dry adhere to your card base.

Stamp out all these cute images from the Penguin Palace, Year of the Dragon stamp set on white cardstock using black ink. Color the images using your favorite medium. Die cut the images using the coordinating dies. 

Create your scene by adhere the images to your card using liquid glue and foam tape for a little dimension. 

Finishing with stamping the sentiment from the Year of the Dragon stamp set directly onto your card using black ink. 


Don't you just love these adorable little images? I had a blast creating this card. Make sure to link up for a chance to win. 

Thank you so much for stopping by.
Have a wonderful day!


The rules are simple. You must create a new Lunar New Year, Chinese New Year or a 2024 Dragon Birthday card and add the link to your post below. Multiple entries are allowed. Backlinking to an older project is strictly prohibited.

Our August Lunar New Year Challenge will run from 12:00am EST on August 1, 2024 through 12:00pm EST on August 31, 2024. We would love to see you using products from our four generous sponsors! The four lucky winners will be randomly selected from all eligible entries and announced at the start of the September Challenge. 

Tuesday, August 6, 2024

August Lunar New Year Challenge Inspiration...


Welcome everyone.. It is time for another fun Lunar New Year Challenge. We have 4 sponsors and I know you all want a chance to win one of them... right? You can link up your projects HERE

Today I am featuring one of the sponsors Simon Says Stamp:

Create card from white cardstock A2 size.

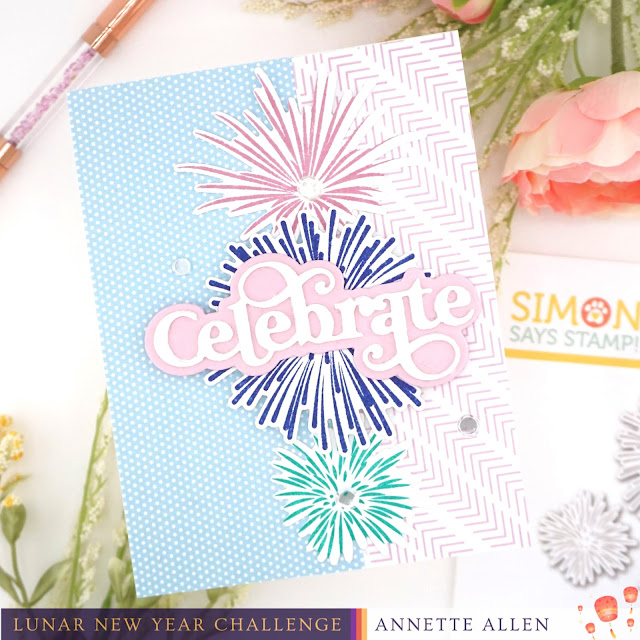
Pick two pieces of fun designer paper and adhere them to your card. You can cut them to meet in the center or set it off to the right or left, leaving one design a little thinner. 

Stamp out the fireworks from the SSS Celebration Fireworks stamp set on white cardstock using the Concord & 9th inks Oceanside, Briar Rose and Blueberry. 

Die cut the fireworks using the coordinating SSS Celebration Fireworks die set. 

Add some foam tape to the large firework and adhere it to the center of where the two patterns meet. Adhere the other two using liquid glue and tuck them behind the large firework just a bit. 

Add a little sparkle with some white solid sequins to the top and lower firework and on the sides of the large firework. 

Die cut the SSS Boho Celebrate sentiment on white and pink cardstock and adhere them together. Add to the card using foam tape. 


Make sure to link up HERE for a chance to win one of the 4 prizes. 


Thank you for stopping by.
Have a wonderful day.

Visit the August Link-Up Party post HERE to see all of the design team projects and be inspired to create your own! When sharing your challenge entries on social media, feel free to save this badge and post it along with your project. Please tag us @lunarnewyearchallenge on Instagram and use the hashtag #lunarnewyearchallenge so everyone can find and be inspired by all your amazing projects.

Saturday, July 6, 2024

July Lunar New Year Challenge....


Happy July blog friends.. Today I am sharing a little inspiration for the Lunar New Year Challenge. It is July and we are ready to see your amazing projects, plus there are 4 amazing prizes up for grabs. But you have to link up for a chance to win. 

Today I am featuring one of our amazing sponsors Hero Arts... Cherry Blossom Cover Plate that I paired up with Trinity Stamps Dragon Dance. 


Create card from white cardstock A2 size. 

On a white A2 panel ink blend to different pinks. Fill the panel with the ink and then die cut this gorgeous Hero Arts Cherry Blossom Cover Plate. On the back add some foam tape here and there and adhere it to your card base. 

Take those two pinks you used and add a little water on a paint brush and pick up some of that ink and sprinkle a little of that color on the white part of the card. 

I added a little glue using my finger to the Cherry Blossoms on the die cut panel and then sprinkled a little Lawn Fawn Prisma Glitter, for a little sparkle. 

I stamped the Happy New sentiment from the Trinity Stamps Dragon Dance stamp set on white cardstock and then die cut using the coordinating dies. I added some foam tape to the back and adhere to the card. 

Stamp the other sentiment right below it using black ink. 

To finish I added some of Honey Bee Stamps pearl stickers here and there. 


A very simple card with a lot of sparkle. 

Supplies used:

THANK YOU SO ALL THE SPONSORS.

The rules are simple. You must create a new Lunar New Year, Chinese New Year or a 2024 Dragon Birthday card and add the link to your post below. Multiple entries are allowed. Backlinking to an older project is strictly prohibited.

Our July Lunar New Year Challenge will run from 12:00am EST on July 1, 2024 through 12:00pm EST on July 31, 2024. We would love to see you using products from our four generous sponsors! The four lucky winners will be randomly selected from all eligible entries and announced at the start of the July Challenge.

Visit the July Link-Up Party post HERE to see all of the design team projects and be inspired to create your own! When sharing your challenge entries on social media, feel free to save this badge and post it along with your project. Please tag us @lunarnewyearchallenge on Instagram and use the hashtag #lunarnewyearchallenge so everyone can find and be inspired by all your amazing projects.

Monday, June 17, 2024

Lunar New Year Challenge... Inspiration


Happy day blog friends.. today and I am sharing a little more inspiration for this month's Lunar challenge. We have amazing sponsors and you still have plenty of time to link up. 

Today's inspiration is from Mama Elephant:
  • New Beginnings Stamp/Die
  • Me and My Dragon Stamp Set
  • Sweet Shoppe Frame Die Set

Create card from white cardstock A2 size.

Cut a piece of red cardstock A2 size and adhere to your card base using liquid glue.

On a piece of white cardstock measuring 4 x 5. Use the Picket Fence Studio paper pouncers with red, pink and teal inks and create a colorful background. 

Die cut the Sweet Shoppe Frame on white cardstock and adhere to your ink background using foam tape. 

Adhere your background to your card base using liquid glue.

Stamp out this adorable dragon from the ME Me and My Dragon stamp set and color using your favorite medium. Die cut or fussy cut the image and adhere to your card. 

Stamp out the sentiment from the ME New Beginnings stamp set on white cardstock using black ink and die cut using the coordinating dies. Adhere to the card using foam tape. 

Finishing with a few misc. silver stars here and there. 


I hope that I have inspired you today to link up. 

Thank you for stopping by.
Have a wonderful day!

Visit the June Link-Up Party post HERE to read the rules, see all of the design team projects and be inspired to create your own! Please tag us @lunarnewyearchallenge on Instagram and use the hashtag #lunarnewyearchallenge so everyone can find and be inspired by all your amazing projects. 

Friday, May 24, 2024

Let Your Light Shine... Lunar New Year Challenge


Happy Friday blog friends.. Today I am sharing a little more inspiration for the Lunar New Year Challenge. There is still time to link up for a chance to win a fabulous prize. You can link up HERE. 


Create card from white cardstock A2 size.

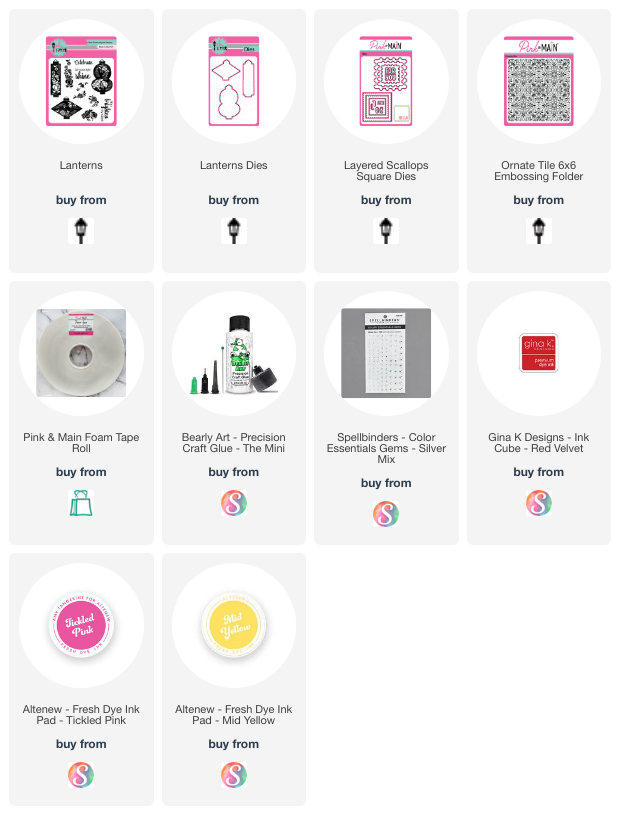
Cut a panel A2 size on white cardstock. Use the Pink & Main Ornate Tile 6x6 Embossing Folder, open the folder and add some yellow ink on the top part of the embossing folder. Put your panel in and emboss the pattern on your paper. You will see that the pattern and ink transfer to your panel. Adhere your panel to your card base using liquid glue.

Stamp out these pretty Lanterns from the Pink & Main Lanterns stamp set using red and pink ink. Die cut the lanterns using the coordinating dies. Add some foam tape to the first one and adhere it at an angle in the center, double up on the foam tape on the second one and adhere it at an angle and make sure to overlap it a little. 

Die cut the large Pink & Main Cloudy Frames Dies on white cardstock, add some foam tape to the back and adhere to the card. Center the best you can. 

Stamp the sentiment on white cardstock using black ink. Die cut around the sentiment using Pink & Main Layered Scallop Square dies. Add a little yellow ink on the lower half of the sentiment. Add some foam tape to the back and adhere it to the center of the lanterns. 

Finishing with a few Spellbinders Paper Arts Color Essentials Gems here and there. 


Make sure to link up for a chance to win... lots of prizes each month that you don't want to miss. 

Thank you for stopping by.
Have a blessed day!

Friday, March 22, 2024

Lunar New Year Challenge Inspiration...


Happy day blog friends.. today I am sharing a little more fun inspiration for the Lunar New Year Challenge. You do not have to do traditional colors so go wild and get creative with your New Years cards and make sure to link up because we have LOTS of amazing sponsors. Don't miss your chance to win. You can link up HERE


Create card from white cardstock A2 size.

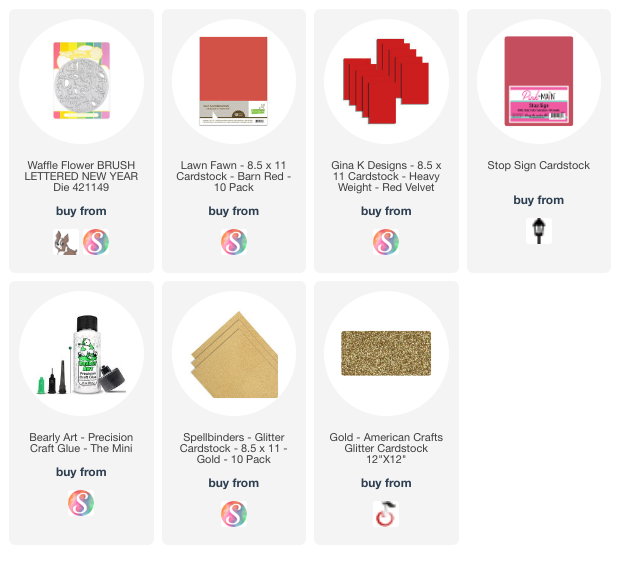
Cut a panel A2 size on white cardstock and die cut the Waffle Flower Crafts: Brush Lettered New Year Die in the center of your panel. Pop out all of the negative pieces but make sure to keep the extras parts of the letters for the H, A, E and the 

Cut three strips out of red cardstock. I used three different colors (light to dark) and cut 2 inch strips and adhered them to the back of my die cut panel. 

Die cut the Waffle Flower Crafts: Brush Lettered New Year Die die again on gold glittered cardstock. We are going to use the negative pieces to fill in confetti around the new year sentiment. Adhere each piece using liquid glue. This takes a while but it really was worth it. 

Adhere your panel to your card base using liquid glue.

Cut a strip 1/2 inch of gold cardstock and adhere it to the bottom of your card. 


I hope that this inspires you to link up on the  Lunar New Year Challenge blog.

Thank you for stopping by.
Have a blessed day!

Thank you to all the sponsors.

Wednesday, March 6, 2024

March Lunar New Year Challenge....


Happy March everyone. Welcome to another fun Lunar New Year challenge. We are all about the new year and this is the year of the dragon so today I am getting crafty with Trinity Stamps, whom is also one of our fabulous sponsors this month. So make sure to link up HERE for a chance to win one of the prizes.


Let's get started..


Create card from white cardstock 4 1/2 x 5 1/2 size.

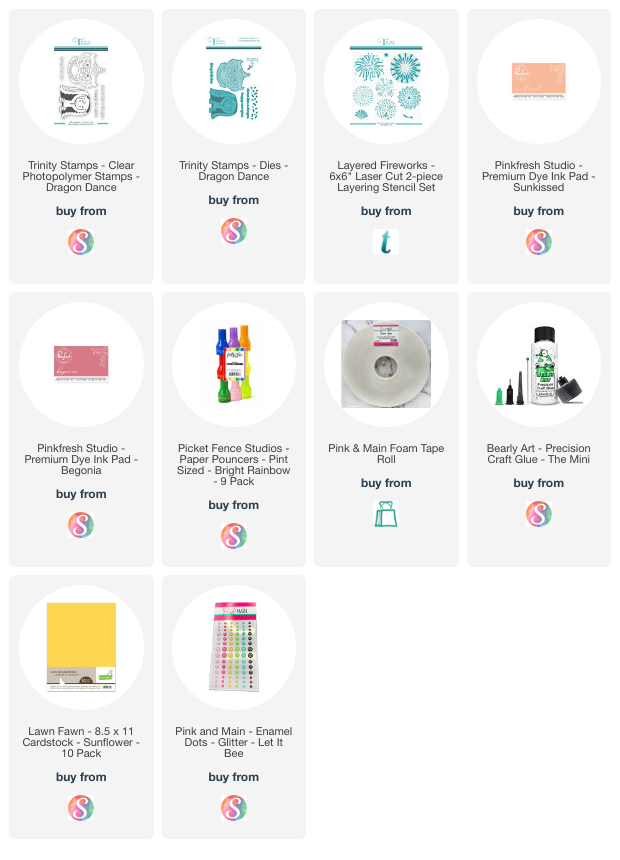
Cut a yellow A2 panel and stencil the Trinity Stamps: Layered Fireworks Stencil using Waffle Flower Crafts: My Pleasure ink and Pinkfresh Studio: Sunkissed ink. Blend the ink softly

Adhere your panel to your card base.

Stamp out this fun images from the Trinity Stamps: Dragon Dance stamp set on white cardstock using black ink and color using your favorite medium. I colored mine using Copic Sketch markers. Die cut the images using the coordinating Trinity Stamps: Dragon Dance dies. Add some foam tape to the back of the images and adhere it to your firework background. The dragon head you will have to double the foam on the top part so it has more dimension than the little guy.  

Stamp out the sentiment from the Trinity Stamps: Dragon Dance stamp set on a piece of white cardstock using black ink and then die cut it using the coordinating Trinity Stamps: Dragon Dance dies. Adhere the sentiment underneath the dancing dragon using liquid glue.


Thank you so much for stopping by.

I hope that I have inspired you today to link up. 

Thank you to all our sponsors.

Monday, February 26, 2024

Lunar New Year Shaker Fun...


Welcome blog friends.. Today I am sharing a little Lawn Fawn New Year shaker fun inspiration for the February Lunar New Year Challenge. I went a little bold with my colors today but why not... right? Let's get started.

Card designed using: (click on the links to go directly to the item)


Create card from white cardstock A2 size.

Cut an A2 panel using bright pink cardstock. Die cut the Lawn Fawn: Coordinates with Fireworks Hot Foil Plate Dies on the panel. Make sure to leave room so you can add the foam tape on the back side for the shaker areas.

Sprinkle a little Copic Opaque mixed with water on the top of your die cut panel. Make sure to let dry completely before handling.

Cut an A2 panel of Lawn Fawn: Specialty Clear Acetate and adhere it to the back of the firework background. I adhere it using tear tape, it is clean and easy to use.

Add some Double Sided Adhesive Foam tape all around the back of the firework background. Make sure not to add foam tape where your firework window is, we don't want to see it from the front.

Add some small star sequins inside each of the firework areas, peel the foam tape protectant off and add a white A2 panel to the back to secure your shaker fun. Now adhere your panel to your card base using liquid glue.

Die cut one of the Lawn Fawn: Fancy Wavy Banners Dies on yellow cardstock and stamp the Happy New Year sentiment from the Lawn Fawn: Winter Way Sayings stamp set using black ink. Now add some Double Sided Adhesive Foam tape to the back and adhere it to your background.

Die cut 2024 from the Lawn Fawn: Henry's 123's three times, two on pink cardstock and the third on glittered gold cardstock. Adhere them all together, leaving the glittered gold on top. Now adhere them to your card using liquid glue.


Nothing like a fun shaker to celebrate the Lunar New Year. 

Make sure to link up HERE for a chance to win a fabulous prize from our sponsors.


Thank you for stopping by.

Tuesday, February 6, 2024

Let The Festivities Begin!...


February Lunar New Year Challenge is live and we have some great sponsors.
Link up your Lunar New Year cards for your change to win here


Welcome everyone... Today I am on the Lunar New Year Challenge blog HERE, I am so excited to be sharing some inspiration with you all for the New Year. It is always fun to learn a little more about how the card was created, so that is what I am sharing with you today.

Card designed using:
  • Catherine Pooler: Paper Lantern Die
  • Catherine Pooler: Lantern Festival Stamp Set
  • Catherine Pooler: Tutti Frutti and Sugared Lavender Premium Dye Ink
  • My Favorite Things: Cascading Scallop Stencil
  • Altenew: Antique Gold Embossing Powder


Create card from white cardstock A2 size.

Cut an A2 panel on white cardstock and stencil the Cascading Scallop stencil using Catherine Pooler Tutti Frutti and Sugared Lavender inks. Before you remove the stencil sprinkle a little gold watercolor mixed with water. I was going for a scale look like a dragon.

Die cut the Paper Lantern Die three times on red cardstock. Adhere them all together for dimension. Use some gold cardstock and cut pieces that will fit behind and shine through the openings of the lantern. Add more foam tape to the back of the latern and add it to your stenciled background.

Adhere the panel to your card base using liquid glue.

Stamp the sentiment from the Lantern Festival stamp set using embossing ink on white cardstock and then heat emboss with gold embossing powder. Trim around the sentiment and adhere it to your card using foam tape.

Finishing up with a few gold sequins here and there.


Make sure you head on over and get inspired to link up on the Lunar New Year Challenge HERE

Thank you for stopping by.

Have a wonderful day!


Wednesday, January 17, 2024

Lunar New Year Challenge...


Happy Day everyone. Today I am here with something new. I have joined the Lunar New Year Challenge design team and today I am offering you a little inspiration. You can link up on the Lunar New Year Challenge blog HERE


This card was inspired by the logo. I love the logo colors and well I just went with it. This challenge is celebrating the New Year all year long. Each month will be a new challenge with lots of inspiration. I hope that you will link up and join the fun. 

Card designed using: 


Create card from white cardstock A2 size.

Cut a panel of red cardstock same size as card base and adhere it using liquid glue.

Die cut the Itsy Bitsy Polka Dot Backdrop on Huckleberry cardstock and adhere it to the top of the card base. You will see the red coming through all those fun polka dots. 

Stamp the sentiment on white cardstock using black ink and die cut the sentiment using the coordinating die. Die cut the sentiment die again two more times and adhere it to the back of the stamped sentiment. This will give the sentiment dimension. Add some foam tape to the back of the sentiment for more dimension and adhere it to your card background.

Stamp out this adorable dragon image and color it using your favorite medium. Die cut the image or fussy cut it and them add some foam tape to the back and add it to the right side of the sentiment. 

Stamp the TE New Years sentiment on red cardstock using embossing ink and them heat emboss gold embossing powder. Die cut the sentiment using the coordinating die, add foam tape to the back of the sentiment and add it to the card. 


It's a New Year Celebration. 

I hope that you are inspired and ready to create. 

Thank you for stopping by.

Have a blessed day!