YAY! for the Christmas season. I have to say I can't get enough of this fun Bella Blvd Merry Mingle collection. It is full of Christmas fun and the possibilities are endless. You know already that I am the card creator, so today I have for you two cards using the Merry Mingle collection.
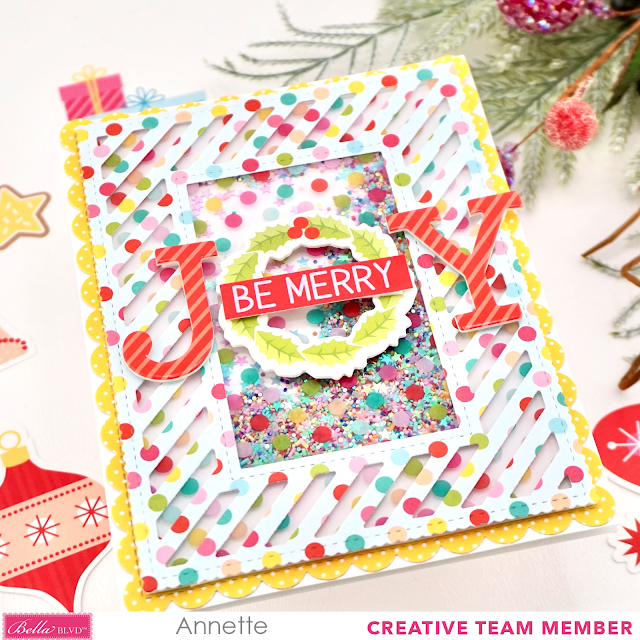
First up we have a shaker card. I know you all love a good shaker card.... right? Creating shakers is easy and I am going to walk you through it now.
Create card from white cardstock A2 size.
Die cut a scalloped rectangle on the Cookie Exchange backer paper. Make sure your scalloped rectangle covers almost the entire card. I know most companies offer die cuts or you can machine cut this pattern on your machine. Adhere the rectangle to your card base using liquid glue.
Die cut or machine cut a decorative rectangle that measures 4 x 5. You want your rectangle to have at least an opening in the center. This will be for the shaker part. I used a die cut on the It's A Party backer paper.
Now cut another rectangle measuring 4 x 5 on the Clear Cuts Cheerful acetate. Adhere this Clear Cut to the back of your decorative rectangle using tear tape.
Flip the decorative rectangle over and add foam tape to the areas where you can't see the foam from the front. I only wanted the shaker to be in the center so I made sure to close that off with the foam tape, so the sequins stay's in this area.
Cut a 4 x 5 piece of white cardstock. In the center of your white cardstock put a small pile of fun shaker bits. Make sure it is in a pile and not spread out. Because we are going to flip the top right over it once we pill the foam tape protector off the foam so it will adhere to the top of the white panel. Now we have a shaker.
Adhere this shaker to the center of your card using liquid glue.
Now let's decorate the front with some of the new Merry Mingle Ciao Chip. I choose the JOY sentiment and added some foam tape to the back. This will give the sentiment just a bit more dimension.
Let's also add the BE MERRY Doohickey sticker to the center of the wreath using foam tape. It is already sticky but I wanted the dimension.
Next up we have layers of the Merry Mingle papers mixed with the Clear Cuts.
Create card from white cardstock A2 size.
Cut three strips on the Let's Get Ugly paper measuring 1 1/4 x 4 1/4, 2 1/4 x 4 1/4 and 1/2 x 4 1/4.
Cut two strips of the Clear Cuts Cheerful measuring 1 x 4 1/4.
Cut two strips of the Let's Get Ugly backer paper measuring 1 x 4 1/4.
Now let's adhere this fun strips to the card base. I started from the top and worked my way down. You will need foam tape and liquid glue.
Use foam tape on the top one. Leave some room to the tuck the Clear Cut under it. The third adhere to the card overlapping the clear cut.
Repeat process for the rest of the pieces. The foam should only be on the Let's Get Ugly paper only.
Cut a rectangle measuring 2 1/4 x 3 1/2 of the Making Spirits Bright backer paper and add some foam tape to the back and adhere it to the center of your card.
Pick out this fun sweater image from the Merry Mingle Ciao Chip board and add it to the center of the small rectangle.
Pick out the sentiment and the heart from the Ephemera Words and adhere to your card.
And to finish let's add the Bella-Pop Cookies & Cocoa Tree cardstock sticker to the center of the sweater.
I know I said it before.... but don't you just love Christmas? This new Merry Mingle collection just makes me love it even more. All the patterns are happy and colorful.
Thank you so much for stopping by today.
Have a festive crafty kind of day.


These are cute! Love that polka dotty shaker card!
ReplyDelete